Saturday, 31 March 2012

Betty's Easter Muffin Delights


We had a bit of a dilemma when deciding about putting this on my blog. The problem we (me and Betty) we having was whether these were cupcakes or muffins. You see we thought that they were the same thing, but cupcakes were just small muffins. How wrong we were! Muffins are apparently more like bread in how they are made and in the ratio of fat to sugar. Whereas cupcakes are more like cake.
So these are muffins. Even though they look a little cupcakey, take my word for it.....muffins.

Ingredients-
Muffins:
150g self raising flour
1/2 tsp bicarbonate of soda
80g caster sugar
60g butter
5tbs natural yoghurt
zest of half a lemon
2tbs lemon juice
1 egg
zest and juice of 1 lime
25g caster sugar

Icing:
250g icing sugar
25g butter
3tbs lemon juice
yellow and green food colouring
30 mini eggs

Method-muffins:

1. Preheat an oven to 190°C.

2. Mix the flour, bicarb and 80g of sugar in a bowl.

3. Melt the butter and mix with the egg, yoghurt, lemon juice and zest.

4. Combine the wet with the dry ingredients and mix as little as possible until just combined.

5. Divide into 10 muffin cases (or less if you want bigger ones) and out into the oven for about 15mins or until golden brown.

6. Put the lime juice and zest and remaining 25g of sugar into a saucepan and heat until sugar is dissolved. Pour over the muffins just as they come out of the oven. (sieve the lime mix if you want to remove the zest)

Method-icing:

1. Melt butter and lemon juice into saucepan.

2. Mix in with sifted icing sugar until smooth.

3. Divide into two halves and put a couple of drops of yellow into one and green into the other.

4. Spread the icing over the (cooled) muffins half and half stylie. Then decorate with mini eggs.


So there we have it. Lovely little muffins of lovliness!

Wednesday, 11 January 2012

Ed's Fisherman's Pie


Okay, so I was at a loose end as to what to call this one. I was playing around with Fish Pie, but it's not only fish that's in it. Then I thought Sea Food pie, but I'm pretty sure it's not all sea food either. Now, I'm aware you could argue, if were the argumentative type, that fishermen don't really catch prawns, so maybe a Fisher/Trawlerman's Pie???? No, that's just silly. Anyway, without further ado.....

Ingredients-
900g potatoes
700ml milk
1 jellied fish stock thingy
85g butter
35g flour
3 onions, roughly chopped
5 cloves of garlic chopped
400g fresh salmon
200g fresh cod
200g raw prawns
100-200g grated Chedder cheese
Salt and pepper


Method:

1. Boil the potatoes in some salted water until they are soft, then add about 50g of butter (or to taste) and salt and pepper, and some milk (again to taste, but I donno......50ml) . Mash and whizz the potatoes until they are smooth and silky, then leave to cool.

2. Preheat the oven to 190°C.

2. While the potatoes are cooling, cut the onions, garlic, and the fish, and de-vein and clean the prawns. Then put them all in an oven proof dish of appropriate size.

3. Then add the milk, the rest (35g) of the butter, into a saucepan and bring to the boil, stir in the flour and the fish stock, and simmer for about 2 mins, making sure to stir continuously.

4. Pour the hot sauce over the mixture in the dish, making sure to mix it around a bit so the sauce gets everywhere. You may not need all the sauce, just fill it to about an inch below the top of the dish.

5. Pipe the potato over the top of the mixture, and top with as much grated cheese as you want. We went a bit over board on the cheese, but it was gooooood! :)

6. Bake in the middle of the oven for 25 to 30 mins.


There you have it, and damn was it good! It's also our lunch for the week. Not the cheapest of the recipes, but it is really tasty, and also has fish in it, which they say we should eat more of!

Monday, 2 January 2012

Hand made White Bread

My god it's been a while hasn't it?? I have been neglecting my blog, and I am sorry. That is not to say that I haven't been cooking though. I will get right on posting some of the things I have been cooking, now that I'm back into it.
This one is a little beauty though. It is just basic, simple, beautiful, crusty white bread. Ever since I came across this recipe I have been wondering why anyone buys bread. Me and Betty haven't bought bread in about 5 months now, because this really is very easy and tasty. The only problem is that you have to make it every 2 or 3 days, as it gets really hard, and it disappears very quickly ;). I say again this is simple basic bread, nothing fancy, nothing added, just bread, so if you looking for something fancy....this ain't for you!!

Ooooh and  one more thing. I am going to use this platform to talk about a new love of mine......Marmite, the missus got me into it, and I haven't looked back. It is just the most amazing thing in the world and I would urge anyone who hasn't tried it to do so. Also If you try it on a piece of this bread straight out of the oven, with some butter, it's heaven!
Right lets get to it.

Ingredients-
750g flour
400ml warm water
11g dried yeast(or twice the amount of fresh yeast, activated*)
A pinch of salt

Method:

1. Put the flour, dried yeast (if using) and salt into a large plastic bowl, and make sure it is well mixed. Make a well in the centre.

2. If you are using fresh yeast (which you can usually get from supermarket bakery counters) then mash it with a fork with a small amount of sugar, and warm water,until it is smooth and frothing slightly.

3. Then add most of the water and mix the mixture with your hands making sure to get all of the flour from the bowl, add more water if its a bit dry, I find you usually need the full 400ml of water.

4. Knead for 15 minutes on a floured work surface until it's smooth and springy use the thumb test to see if it's ready (press your thumb gently into the dough a couple of centimetres, as you take your thumb out if the dough springs back it's ready). Also here is a good video on kneading-http://www.youtube.com/watch?v=dWj8oHMPFm0

5. Next clean out the bowl and lightly oil it. Place the dough in the bowl making sure its well covered with oil and cover the bowl with a tea towel. Leave to rise in a warm place for about 40 minutes to an hour, or until doubled in size.

6. Then you punch the air out of the dough, and knead for another 10 to 15 mins, then place it in a loaf tin (for this recipe a tin about 30 to 40 cm is perfect, if yours is a different size, just adjust the proportions of everything accordingly). Leave it in the tin for another 30 minutes to prove. About 20 mins in preheat the oven to 220°C.

7. Now score the top of the loaf gently length-ways with a nice sharp knife and sprinkle the top with some flour. Put the bread in the centre of the oven at this temperature for 20 minutes. Then turn the oven down to 190°C for a further 30 minutes.

That's it, take it out, cut it, and enjoy. Oh and try it with some butter and Marmite!!

Also I will try to write again as soon as I can. It's my new year's resolution.


Monday, 20 June 2011

Sticky Chocolate Covered Chocolate Brownies

First up sorry for the lack of posts lately, but I haven't been cooking a lot. I've been eating a lot of couscous with different things in it for lunch, as it's healthy and easy! I must get back to cooking though, I miss it.
Anyway, never mind that. These brownies are very sticky, and gooey, and rich. In fact I can just about get through one, but that's probably a good thing, because they are VERY bold!
So here we go.

Ingredients-
Brownies(about 9)-
200g plain chocolate
75g milk chocolate
115g butter
100g light brown sugar
50g white sugar
2 eggs
15ml vanilla extract
70g flour
100g chopped toasted pecans (also leave some whole ones for decoration)
150g white chocolate chopped into little pieces

Sticky Chocolate Gooey Goodness-
100g plain chocolate
70g milk chocolate
50g butter
30ml golden syrup
10ml vanilla extract

Method-Topping:

1. Chop everything up nice and small.

2. Melt gently in a pot, making sure to stir a lot.

3. Allow to chill for at least an hour, and that's it easy!

Brownies:

1. Preheat the oven to 180°C.

2. Put the plain and milk chocolate, and butter into a large pan and melt gently stirring a lot.

3. When that's melted add the sugar and stir until dissolved.

4. Beat in the eggs quickly so they don't scramble, also add the vanilla.

5. Stir in the flour a little, just until it's just mixed in, then add the pecans and white chocolate.

6. Pour the mix into a baking tray, I like the shape I used as it makes nice deep brownies. Have the tray lined with tinfoil that has been well greased with butter.


7. Bake for 30 minutes or so, until a knife stuck into the centre comes out clean'ish.

8. Leave to cool in the tray on a rack for about half an hour, then remove (using the clever tinfoil wrapped around it) and leave to cool for a couple of hours, or until cool!


9. Spread the topping over the Brownie cake thing, then decorate with pecans and cut into Brownies!


A couple of things on this one. When I made it I baked it for half an hour and it came out a little soft, so 35 minutes, or even at a slightly higher temperature for 30 minutes, I haven't tried either, but I will post if I do!
Also play with the ratio of milk to plain chocolate, the way I've put it still makes it quite rich, if you prefer it less rich, use more milk chocolate. Also.......enjoy :-) x.

Tuesday, 5 April 2011

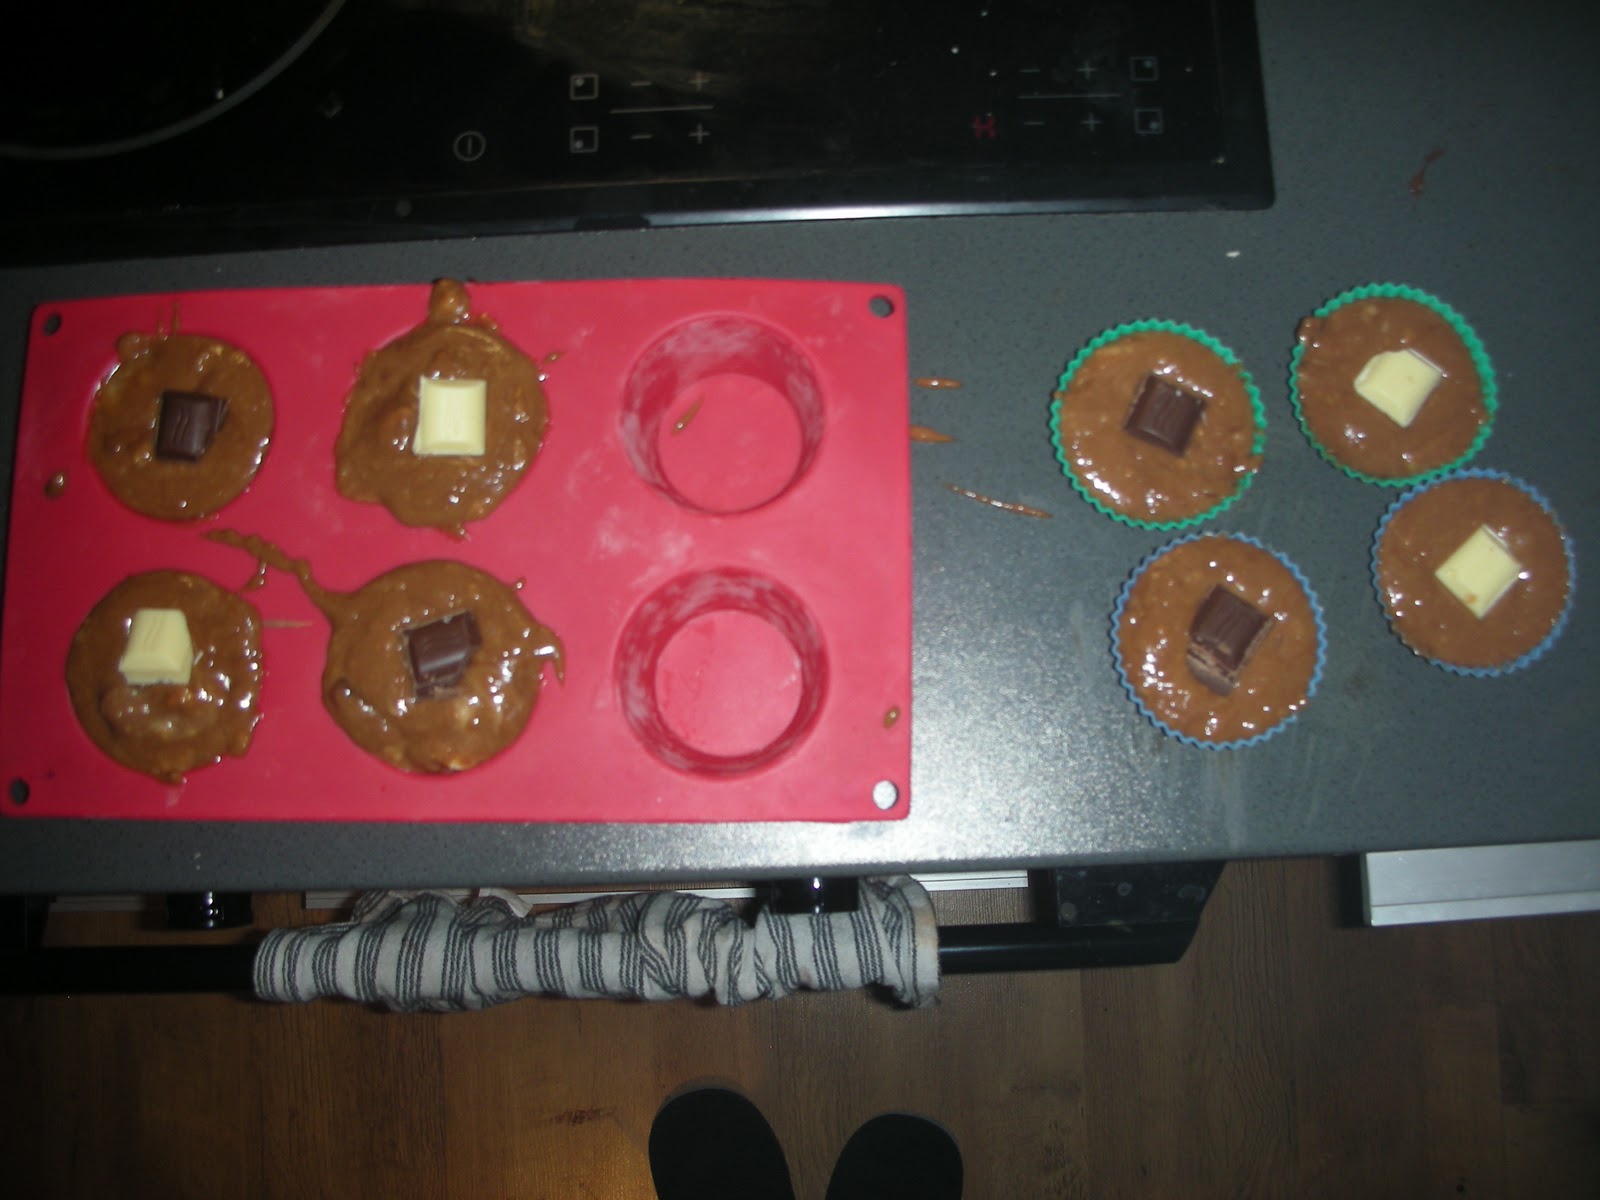
Melting 'centre' muffins

Oh yes, you read correctly, the reason I used the quotation marks is that some of them were melted in the centre, some at the bottom, some at the top, but there was something melt-y in them all!!

The muffin recipe was given to me by the lovely Cathy O'Boyle and the rest I came up with, with the help of the internet as usual.

Ingredients-
Muffins(makes about 6 large ones)-
150g flour
50g caster sugar
1 tsp baking soda
a pinch of salt
50g butter
100ml milk
1 egg
115g milk chocolate
 Some more milk/white/dark chocolate for chunks

Centre-
200g chocolate
200ml single cream


Method-Centre:

1. Melt chocolate in a double boiler or bain-marie (or a bowl over a pot of boiling water).

2. Whisk in the cream until it's smooth.

3. Let the mixture cool, then make it into little sausage shapes the size of the top of your thumb-ish. Wrap them in cling film, put in a freezer bag and freeze solid!

Muffins:

1. Melt the chocolate and butter separately and let cool a little.

2. Mix together the dry ingredients.

3. Mix together the egg and milk.

4. Mix the wet into the dry (including the chocolate and butter) gently and until just combined, don't over do it. Then add as much chocolate chunks as you like, about 250g more is plenty. I tend to just bash up a couple of chocolate bars.

5. Put the mixture into fairly big muffin molds, pouring in half then adding the frozen 'centres' then topping up making sure they are covered.


6. Put the muffins into an oven at 250°C  for about 5 minutes then put the heat down to 180°C for about 15 more. Then take the muffins out and allow to cool.


A few notes needed on these I feel. The center is actually just a chocolate ganache, so when the muffins are cold it is more of a creamy centre, when they're warm though it is melty and nice!Also you may notice I put bits of chocolate on the top of the muffins-not a good idea, because when the centre, is actually in the centre it falls into the melty bit, which is nice, but doesn't look as good!
Oh and obviously if you just make them without the centre, they make lovely chocolate chunk muffins, which are tasty too!

Other than that, enjoy!

Tuesday, 1 March 2011

Chorizo and Sausage Goulash

Oh yes, I said it, and it's goooooood. Got this off "Something for the Weekend" and I liked how it looks so much that I tried it! Also I made it for my lunch this week, and it keeps wonderfully well, and has a lovely thick sauce to it, that just LOVES loads of bread to soak it up.

It is also one of the shorter-cooking weekly meals I've made in a while, takes only about an hour from start to finish. Not sure it's the healthiest though, but it's not too bad, I've tried to be good on the the days I've it though, cos it's full of yummy/bold things.

Anyway here it is.

Ingredients-
225g Chorizo
800g Beef sausages (or pork ones I'm sure would be lovely, or any sausages for that matter)
1 onion sliced thin
2 cloves of garlic chopped up finely
1 red pepper sliced
2-3 chilis seeded or not again depending on how hot you want it ;)
1-2 tbsp paprika or even more if you like paprika!
olive oil
200ml of beef stock
100g flour
50g-100g sour cream
salt and pepper to taste
a hand full of fresh parsley

Method:

1. Preheat your oven to 180°C. In a large pot, fry the sausages and chorizo in a small amount of olive oil until they are nice and brown and crispy (try to avoid eating them all at this stage-I almost made that mistake)

2. Take them out and sweat the onions in garlic in the copious amount of lovely red tainted oil (sweat=gently fry until transparent not brown).

3. Then add the flour and fry for a little longer, then put back in the sausages, chorizo, sliced red pepper, chilis and the stock.

4. After you put in the stock then add the paprika NOT before as it burns easily and isn't nice when burned.

5. Then put the pot in oven for about half an hour to 40 mins.

6. Take it out and stir in as much sour cream as you like-depending on how creamy you like it. I used about 50g and it was nice and thick.

7. Add the parsley, chopped, to the top and enjoy!

As I said I had it with LOADS of bread. Think they had it with rice on SFTW, anyway have it with whatever you like.


Let me know what ya think peeps!

Wednesday, 23 February 2011

Guacamole

OK here's an easy one! Had a craving for it this week, so I made it. Sooooo much better, and cheaper than the one's you can buy, and you add what you like so I just think it's great.

Ingredients-
1 avocado
1 small red onion (gotta be red, white are a bit strong)
1 clove of garlic (or more if you like)
olive oil
salt and pepper
juice of a half to one lime-to taste.
2-3 cherry tomatoes 

Method:

1. Cut the avocado in half and take out the seed (really easy if you just chop the knife into it and pull it quickly out). The scoop out the flesh.

2. Dice the onion into very small chunks and mash the garlic, and chop the tomatoes into small chunks.

3. Put the avocado into a bowl and mash it with a fork...OR... you could be lazy like me and put it in a food processor (with the tomatoes roughly chopped, onions and garlic if you like) and make it smooth, either way about half way through slowly add the oil until it's as smooth as you like, or don't add it at all! I like it as it makes it very smooth.

4. When it's as smooth or chunky as you like then stir in everything else, to taste!

There you go, very easy, and looovely!